Cyanotype is a 170 year old photographic printing process that produces prints in a distinctive dark greenish-blue. The process was invented by Sir John Herschel, a brilliant astronomer and scientist, in 1842.Compared to other photographic printing processes, cyanotype is easy and inexpensive. No darkroom is needed, instead it uses the power of the sun and iron salt solutions rather than the silver salt solution of black and white photography. Ferric ammonium citrate and potassium ferricyanide are combined, and exposure to UV light creates ferric ferrocyanide, also known as Prussian Blue (named for the color of the Prussian military uniforms.) The cyanotype process was also used to create copies of technical and architectural plans, and these copies were called blueprints; even though the cyanotype process is no longer used, any construction document or detailed plan is still referred to as a blueprint.(read more)
Materials :Cyanotype kit, film print paper, photographic paper.
Step 1 : Make inverted photos,and print them on film print paper. Use Photoshop to create inverted photos.
Step 2: Use your cyanotype kit, Mix the medicine according to the instructions and apply it evenly on the photographic paper, drying quickly.
Step 3: Put inverted photo on the photographic paper, and then fix. Exposure to the sun for about 20 minutes. The illumination intensity is different in different regions, and the exposure time can be adjusted according to the situation.
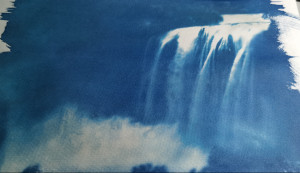
Step 4:Rinse with water and dry. You will get a beautiful blueprint.
BTW: We are selling good quality photo frames at reasonable prices. Details can be found here if you need them.